
I’ve recently been implementing CIS Benchmark for Intune, and one of big chapters within it were Windows User Rights. Unfortunately, MS documentation was poorly written and confusing, to say the least.
Not only was it discussed here: Give an example how to give user rights with MDM Policy CSP · Issue #856 · MicrosoftDocs/windows-itpro-docs · GitHub but also a lot of questions have been raised directly in the benchmark discussion, so I’ve decided to show you how to do this properly.
First of all, in order to set up user rights, you either need to assign them to groups, or to SIDs of these groups. The latter is a better choice because you don’t have to worry about different OS languages.
- Go to endpoint.microsoft.com and navigate to Devices -> Windows -> Configuration profiles -> Create profile -> Platform – Windows 10 and later, Profile type – Templates and select Custom
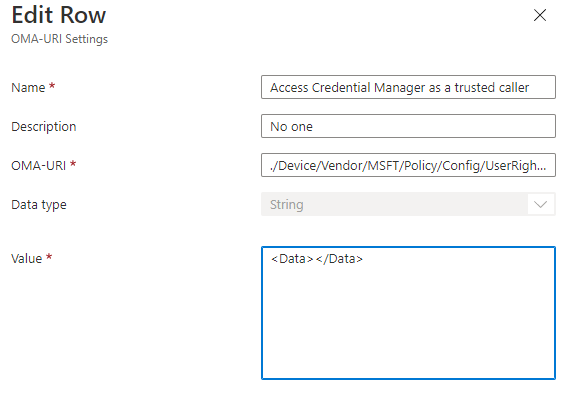
- Fill out Name, Description, and OMA-URI for the User Rights you wish to configure. You can find OMA-URIs there https://docs.microsoft.com/en-us/windows/client-management/mdm/policy-csp-userrights
- Now the most important part is Value. In order to use SIDs always start them with an asterisk (i.e. *S-1-5-32-544, or *S-1-5-32-555). You can find well-known SIDs there Security identifiers (Windows 10) – Windows security | Microsoft Docs.
The most confusing part is the separator itself. Go to Online XML entity decoder | Coder’s Toolbox (coderstoolbox.net), select: XML, Decode, US-ASCII and enter this string as an Input & # 6 1 4 4 0; (remove spaces!).
It should look like this: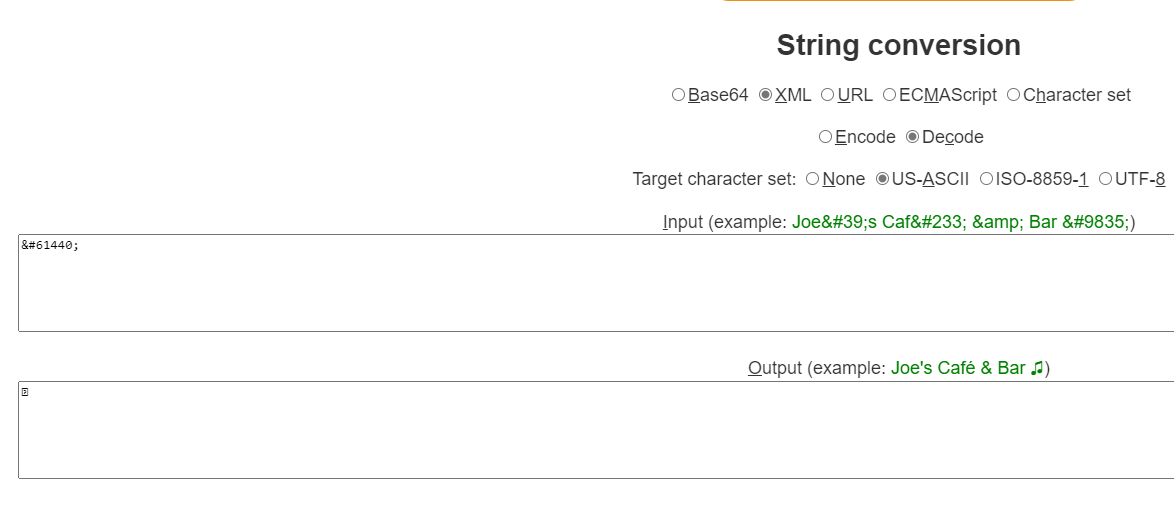
- Copy the separator from Output and paste it in Intune. It should appear as a square.

- If you wish to empty the list of assigned groups in User Rights, you should use < Data></ Data> (also remove spaces!). This will empty any assignments.
- Let’s save the policy and check the per-setting status, to make sure that it applied correctly.

- To verify if it also applied correctly to the device we can use secpol.msc, navigate to Local Policies -> User Rights Assignment.
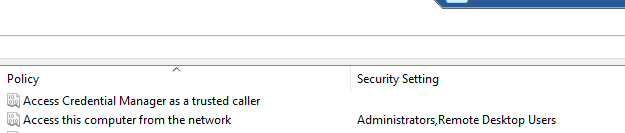
- Screenshot above shows that this setting has been deployed correctly. This is a proper way to deal with User Rights (unless for some reason you want to use Endpoint Protection policies).
I’ve preferred to stick with ADMX and OMA-URIs for the CIS Benchmark as I think it looks tidier, rather than having policies all over the place 🙂